
iOS Push Notifications with Supabase Auth in FlutterFlow


Published on March 29th, 2025
Until the day of the writing this post, I had been vocal about what I thought was FlutterFlow's greatest failure:
If you're using Supabase Auth, you don't get iOS push notifications.
There were videos on Youtube describing the whole process, blog posts, community posts... it was obviously a big problem, yet one that seemingly kept getting swept under the rug. Some had described downloading everything, setting up Xcode and so forth... Others just never mentioned that what they were doing was only ever going to work for Android.
I was shocked something so basic could've been overlooked.
But today, Flutterflow released a simple feature. Not a direct cure for the problem, but it unblocked the path so I could fill in the rest.
If you're using Supabase Auth and you need iOS push notifications, this article will get you there. Just a few configurations in Supabase, a little copy-pasta in FlutterFlow, and iOS push notifications will work.
Pre-requisites
This article assumes familiarility with FlutterFlow and Supabase – I won't be covering the basics. It's assumed that you've followed the FlutterFlow docs for push notification set up in the App Store and Play Store, as well as Firebase setup (make sure you don't forget the APNs certificate).
I realise we're in Supabase land, so why am I talking about Firebase?
Supabase doesn't do push notifications, so another provider is needed. OneSignal is an alternative option, but since Firebase is so deeply integrated with FlutterFlow, it makes the most sense to me to use Firebase Cloud Messaging (FCM) as the provider. And it's free of cost too.
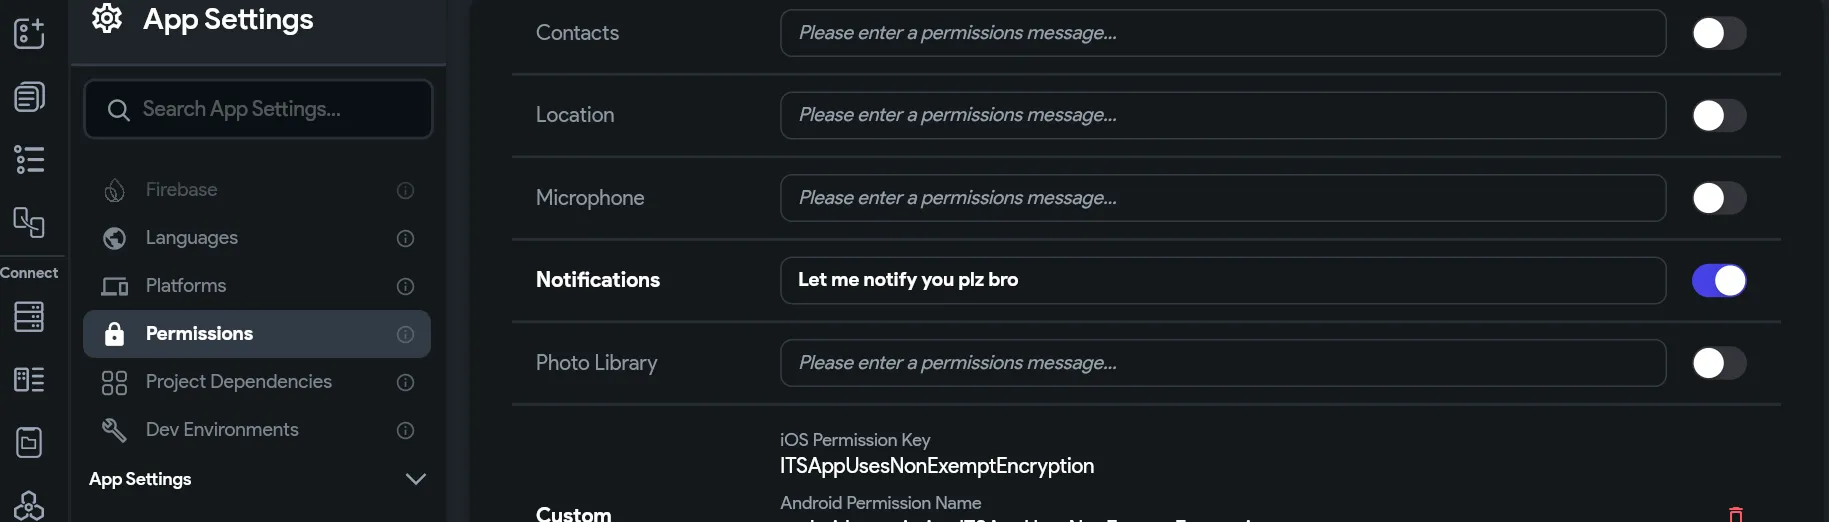
Be sure you're using Supabase Auth (though this article would be a bit redundant if you weren't). You'll notice that you cannot toggle the conventional push-notifications switch when you're using Supabase Auth.
Also, it's critical that you have Notifications set with an appropriate
permissions string in FlutterFlow's App Settings > Permissions.
FlutterFlow setup
The default flow with Firebase Auth and FCM in FlutterFlow is a one-click
deploy. When you toggle the switch under "Push Notifications", FlutterFlow
will deploy a cloud function that adds the FCM token to Firestore as a
subcollection of the user's document. It also adds critical code in the info.plist and Runner.entitlements
files. None of this will happen with Supabase Auth.
Until now, these files couldn't be edited. That's the feature that FlutterFlow just gave us. Now we can edit them.
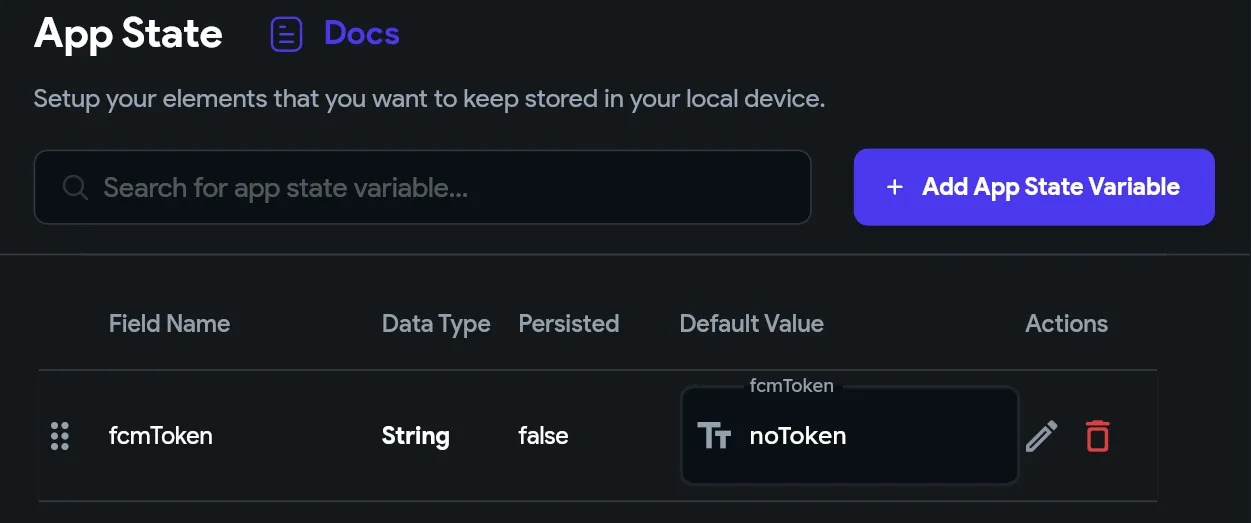
But first thing's first. Go to App State and create a new App
State variable. Name it fcmToken and make it a String.
Next head to Settings > Custom Code and create
a new Custom Action. Name it
setFCMToken or something similar, add the FlutterFlow boilerplate,
and then copy-pasta this code below the
// DO NOT REMOVE OR MODIFY THE CODE ABOVE! line:
// DO NOT REMOVE OR MODIFY THE CODE ABOVE!
import 'package:firebase_core/firebase_core.dart';
import 'package:firebase_messaging/firebase_messaging.dart';

Future setFCMToken() async {
  await Firebase.initializeApp();

  FirebaseMessaging messaging = FirebaseMessaging.instance;
  NotificationSettings settings = await messaging.requestPermission(
    alert: true,
    badge: true,
    sound: true,
  );

  FFAppState().fcmToken = "About to check PN permissions";

  if (settings.authorizationStatus == AuthorizationStatus.authorized) {
    FFAppState().fcmToken = "authorizing works";
    try {
      String? fcmToken = await messaging.getToken();
      FFAppState().fcmToken = fcmToken ?? "";
    } catch (e) {
      FFAppState().fcmToken = e.toString();
    }
  }
}
Now, go to "PubSpec Dependencies" on the bottom right of the same screen
and add firebase_messaging
as a dependency. Feel free to pin this to a particular version if you want.
Then go to main.dart, and set the setFCMToken action
to the list of "Final Actions". Don't forget to hit Save.
In your UI, go to the sign-up page, and open the action flow editor.
You'll hopefully already have an action on sign-up that creates a row in
the public.users table. This is what's recommended in the official
docs, though it doesn't necessarily need to be called users,
it could be called something like profiles instead.
The additional part here is that as you create this row, you'll also set a
value for a new column called fcm_token. In the Supabase
dashboard, go ahead and create this column on the public.users table, and then update the Supabase schema in FlutterFlow. The value to set
is the fcmToken App State variable.
It's also a good idea to update the FCM Token on log-in, so add a Supabase update query to the Login button's action flow too.
Adjusting the Flutter config files
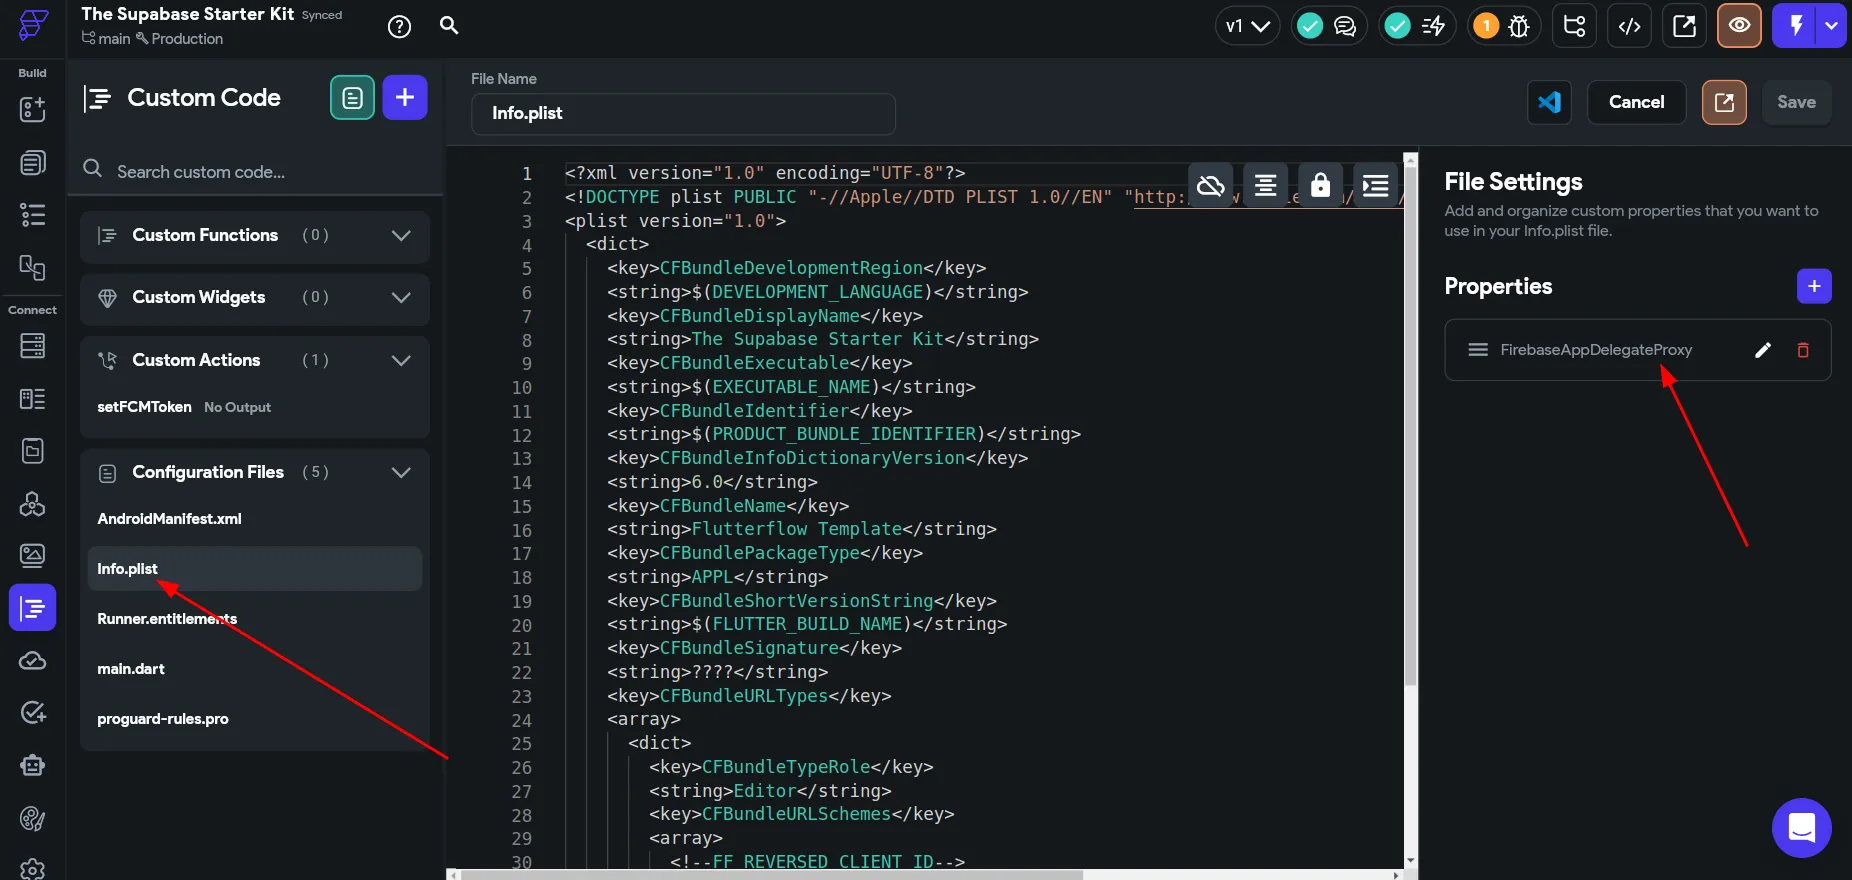
Next we'll make a small change to the newly editable files info.plist and Runner.entitlements.
For info.plist, add a property. Call it FirebaseAppDelegateProxy
and use this code:
<key>FirebaseAppDelegateProxyEnabled</key>
<true/>
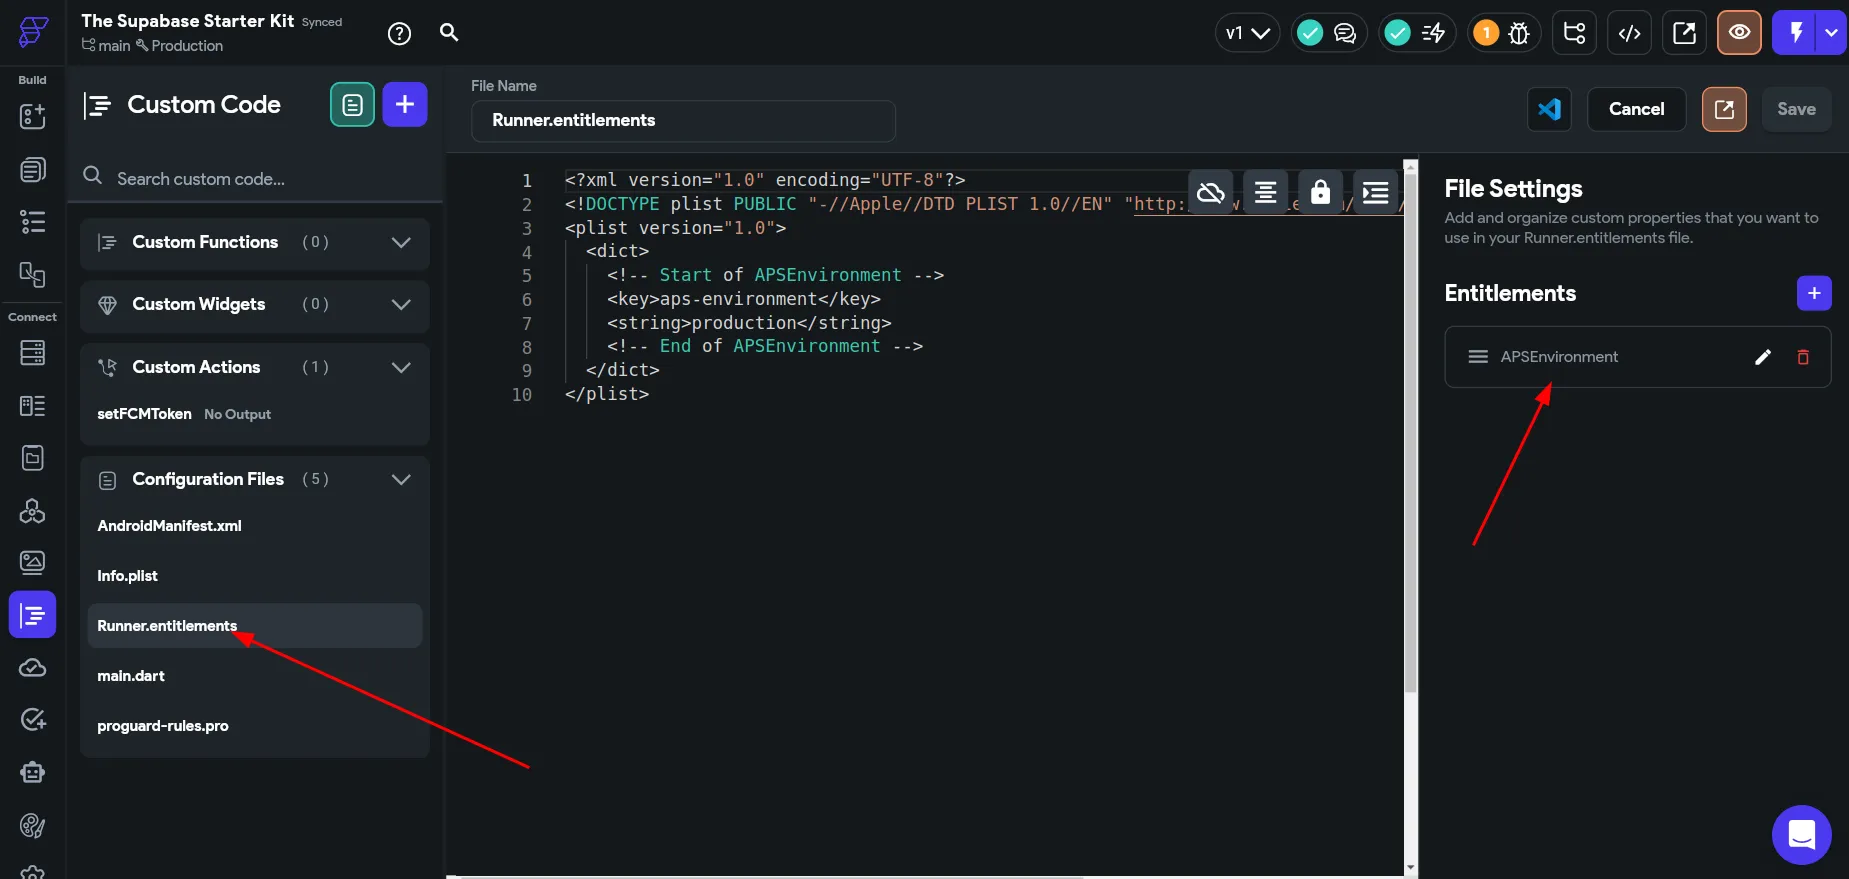
In the Runner.entitlements file, add an entitlement. Call it APSEnvironment
or something like that, and use this snippet:
<key>aps-environment</key>
<string>production</string>
That's everything, simple as that. Compile the custom code and deploy the project on a simulator or device that's capable of receiving push notifications.
Supabase Setup
We're using Supabase Auth, so the auth.users table is in play,
but as I said earlier, you'll also need a separate user profile table in the
public schema. You can call this users, profiles, or whatever you want. I like to call it users.
public.users is where you'd normally store less sensitive or user-editable
data, like a display name or an avatar photo. It's also a good place to save
the FCM tokens we're generating with the setFCMToken
Custom Action.
What the custom action does is to grab the FCM token when the app starts up and keep it in the App State. When the user logs in or signs up, the Supabase insert you set up in the previous section (on the FlutterFlow sign-up and login action flows) will save the FCM token into the database.
Create a table in Supabase called notifications, or something
similar. The idea is that when you insert a row into this notifications
table, the push notification will fire as a side effect. This is done with
a webhook, which is basically just a tool that allows something to happen
as a result of something else happening.
Feel free to create the notifications table yourself, or simply run this SQL snippet in the Supabase SQL editor:
create table public.notifications (
  id bigint generated by default as identity not null,
  created_at timestamp with time zone not null default now(),
  title text not null,
  body text not null,
  recipient_id uuid not null default gen_random_uuid (),
  is_read boolean not null default false,
  constraint notifications_pkey primary key (id),
  constraint notifications_user_id_fkey foreign KEY (recipient_id) references users (id) on update CASCADE on delete CASCADE
) TABLESPACE pg_default;
There are other ways to set up a notifications table, so don't take the above as gospel. Also note that I'm not going to get into RLS right now, but you'll need your own RLS policies. It's often easier with error-prone setups like this to turn off RLS until the notificiations are working. But it's non-optional to turn it on and set up appropriate RLS policies thereafter.
To use the webhook, we to first need to set up the Supabase Edge Function. If you've never deployed a Supabase Edge Function before, I won't cover that here. There are plenty of guides/videos/docs to learn how to use the Supabase CLI and deploy edge functions online.
Here's the edge function. Feel free to modify it, and try to form at least a basic understanding of what it's doing. If you have fields in your notification table that don't match the edge function, modify the edge function.
import { createClient } from 'npm:@supabase/supabase-js@2'
import { JWT } from 'npm:google-auth-library@9'
import serviceAccount from '../service-account.json' with { type: 'json' }

interface Notification {
  id: string
  recipient_id: string
  title: string
  body: string
  is_read: boolean
}

interface WebhookPayload {
  type: 'INSERT'
  table: string
  record: Notification
  schema: 'public'
}

const supabase = createClient(
  Deno.env.get('SUPABASE_URL')!,
  Deno.env.get('SUPABASE_SERVICE_ROLE_KEY')!
)

Deno.serve(async (req) => {
  let fcmToken: string
  let accessToken: string

  const payload: WebhookPayload = await req.json()

  try {
    const { data } = await supabase
      .from('users')
      .select('fcm_token')
      .eq('id', payload.record.recipient_id)
      .single()

    fcmToken = data!.fcm_token

    accessToken = await getAccessToken({
      clientEmail: serviceAccount.client_email,
      privateKey: serviceAccount.private_key,
    })
  }
  catch (e) {
    return new Response(e.message, { status: 500 })
  }


  try {
    const res = await fetch(
      `https://fcm.googleapis.com/v1/projects/${serviceAccount.project_id}/messages:send`,
      {
        method: 'POST',
        headers: {
          'Content-Type': 'application/json',
          Authorization: `Bearer ${accessToken}`,
        },
        body: JSON.stringify({
          message: {
            token: fcmToken,
            notification: {
              title: payload.record.title,
              body: payload.record.body,
            },
            apns: {
              payload: {
                aps: {
                  sound: 'default',
                },
              },
            },
          },
        }),
      }
    )

    const resData = await res.json()

    if (res.status < 200 || 299 < res.status) {
      return new Response(`"Data from the response return a non-200 status: ${JSON.stringify(resData)}`, { status: 500 })
    }

    return new Response(JSON.stringify(resData), {
      headers: { 'Content-Type': 'application/json' },
    })

  }
  catch (e) {
    console.error(e)
    return new Response(e.message, { status: 500 })
  }


})

const getAccessToken = ({
  clientEmail,
  privateKey,
}: {
  clientEmail: string
  privateKey: string
}): Promise<string> => {
  return new Promise((resolve, reject) => {
    const jwtClient = new JWT({
      email: clientEmail,
      key: privateKey,
      scopes: ['https://www.googleapis.com/auth/firebase.messaging'],
    })
    jwtClient.authorize((err, tokens) => {
      if (err) {
        reject(err)
        return
      }
      resolve(tokens!.access_token!)
    })
  })
}
The edge function needs Firebase Admin privileges. Go to Firebase >
Project Settings > Service Accounts, and grab a Service account private
key. Name it service-account.json and save it into the functions/send-push-notification directory locally. Add the code from above to index.ts and deploy
the function. If you don't understand what that means, you'll need to brush
up on
Edge Functions.
Supabase will probably autocreate the Supabase credentials secrets, but
check to make sure SUPABASE_URL and SUPABASE_SERVICE_ROLE_KEY are present as Secrets.
The edge function takes as inputs the title, body, and recipient_id. Then it authenticates with Firebase and
then sends the push notification.
Testing the edge function
At this point, you can test it.
Before testing, you'll need to have registered at least one user on your
app. After registration, check to see if the public.users table
has been populated with the user's data, along with the fcm_token. If it hasn't, go back and debug the issue before moving forward.
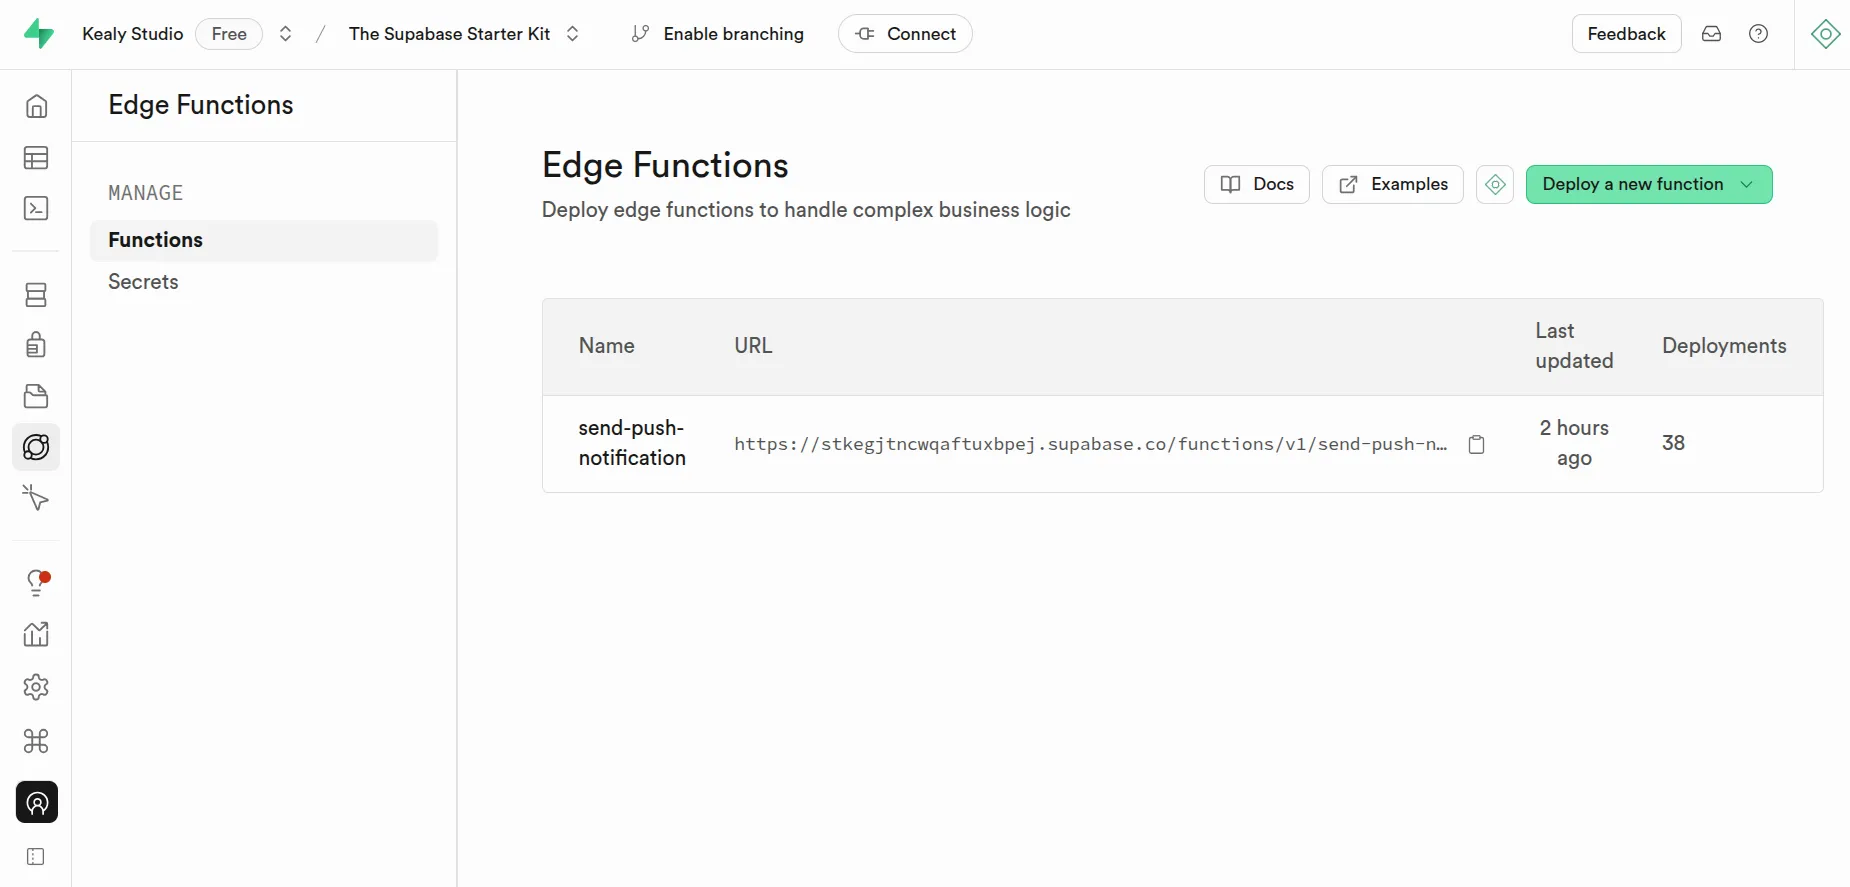
Then feel free to test the API request to the edge function by any means
you like. Supabase will actually give you a few options if you navigate to
the details section of the edge function. Here I'll use the curl
option. Replace my TOKEN with the one Supabase gives you in the
example.
curl -L -X POST 'https://stkegjtncwqaftuxbpej.supabase.co/functions/v1/send-push-notification' \
  -H 'Authorization: Bearer $TOKEN' \
  -H 'Content-Type: application/json' \
  -d '{
    "type": "INSERT",
    "table": "notifications",
    "record": {
      "title": "Hi Mom!",
      "body": "Hello, this is a test notification!",
      "recipient_id": "b17dc32e-6d62-4a36-b1be-6c75d398c8d9"
    },
    "schema": "public"
  }'
If your device does not get a push notification, go back and debug.
Creating the webhook
Now we'll create the webhook. In Supabase, go to Database >
Webhooks, and create a new webhook. Name it something like send-push-notification. Conditions to fire webhook will be an
insert on the public.notifications table, of type
Supabase Edge Functions, method is POST, and
then choose the Edge Function we just deployed.
Simple enough. Now, whenever a new row is created in notifications, you'll get a push notification. Bear in mind that there's a recipient_id
field here, so each notification needs a unique recipient. This way, each recipient
can keep track of read and unread messages, and you can easily create a notifications
history in the app.
Sending a notifications to all users or a segment of users is beyond the scope of this article, but it can be done with the right modifications.
You can test the webhook by manually creating a notification row in the Supabase dashboard. Once that's working, go ahead and add the logic in FlutterFlow. All you need to do is a Supabase insert query. Remember that grabbing the recipient UID still needs to happen, and the way to do that will depend more generally on how you want to trigger notifications.
Conclusion
At this point, iOS notifications should be working, along with Android.
There are a few broader concepts that I didn't cover here. One is deep links. Another is app badges. While the edge function is capable of setting app badges, FlutterFlow won't let you use the action that removes them, if you're on Supabase Auth. These things can be achieved with custom code, but that's a topic for another day.